Compare
Compare environments
Compare queries M3 tables in real time and shows two environments side by side, for example TST against PRD. Use it to verify that a configuration change made it to production, to spot drift between environments, or to compare two companies or divisions in the same environment.
Overview
Compare reads tables through the standard ExportMI API, as the signed-in user, and works in two ways:
- Comparing the same table between two environments, or two companies/divisions.
- Browsing data in a single environment with Browse mode.
Pick your environments
At the top of the Compare workspace, choose the left and right environment and the company/division for each side. For example TST 780/AAA on the left and PRD 780/AAA on the right:
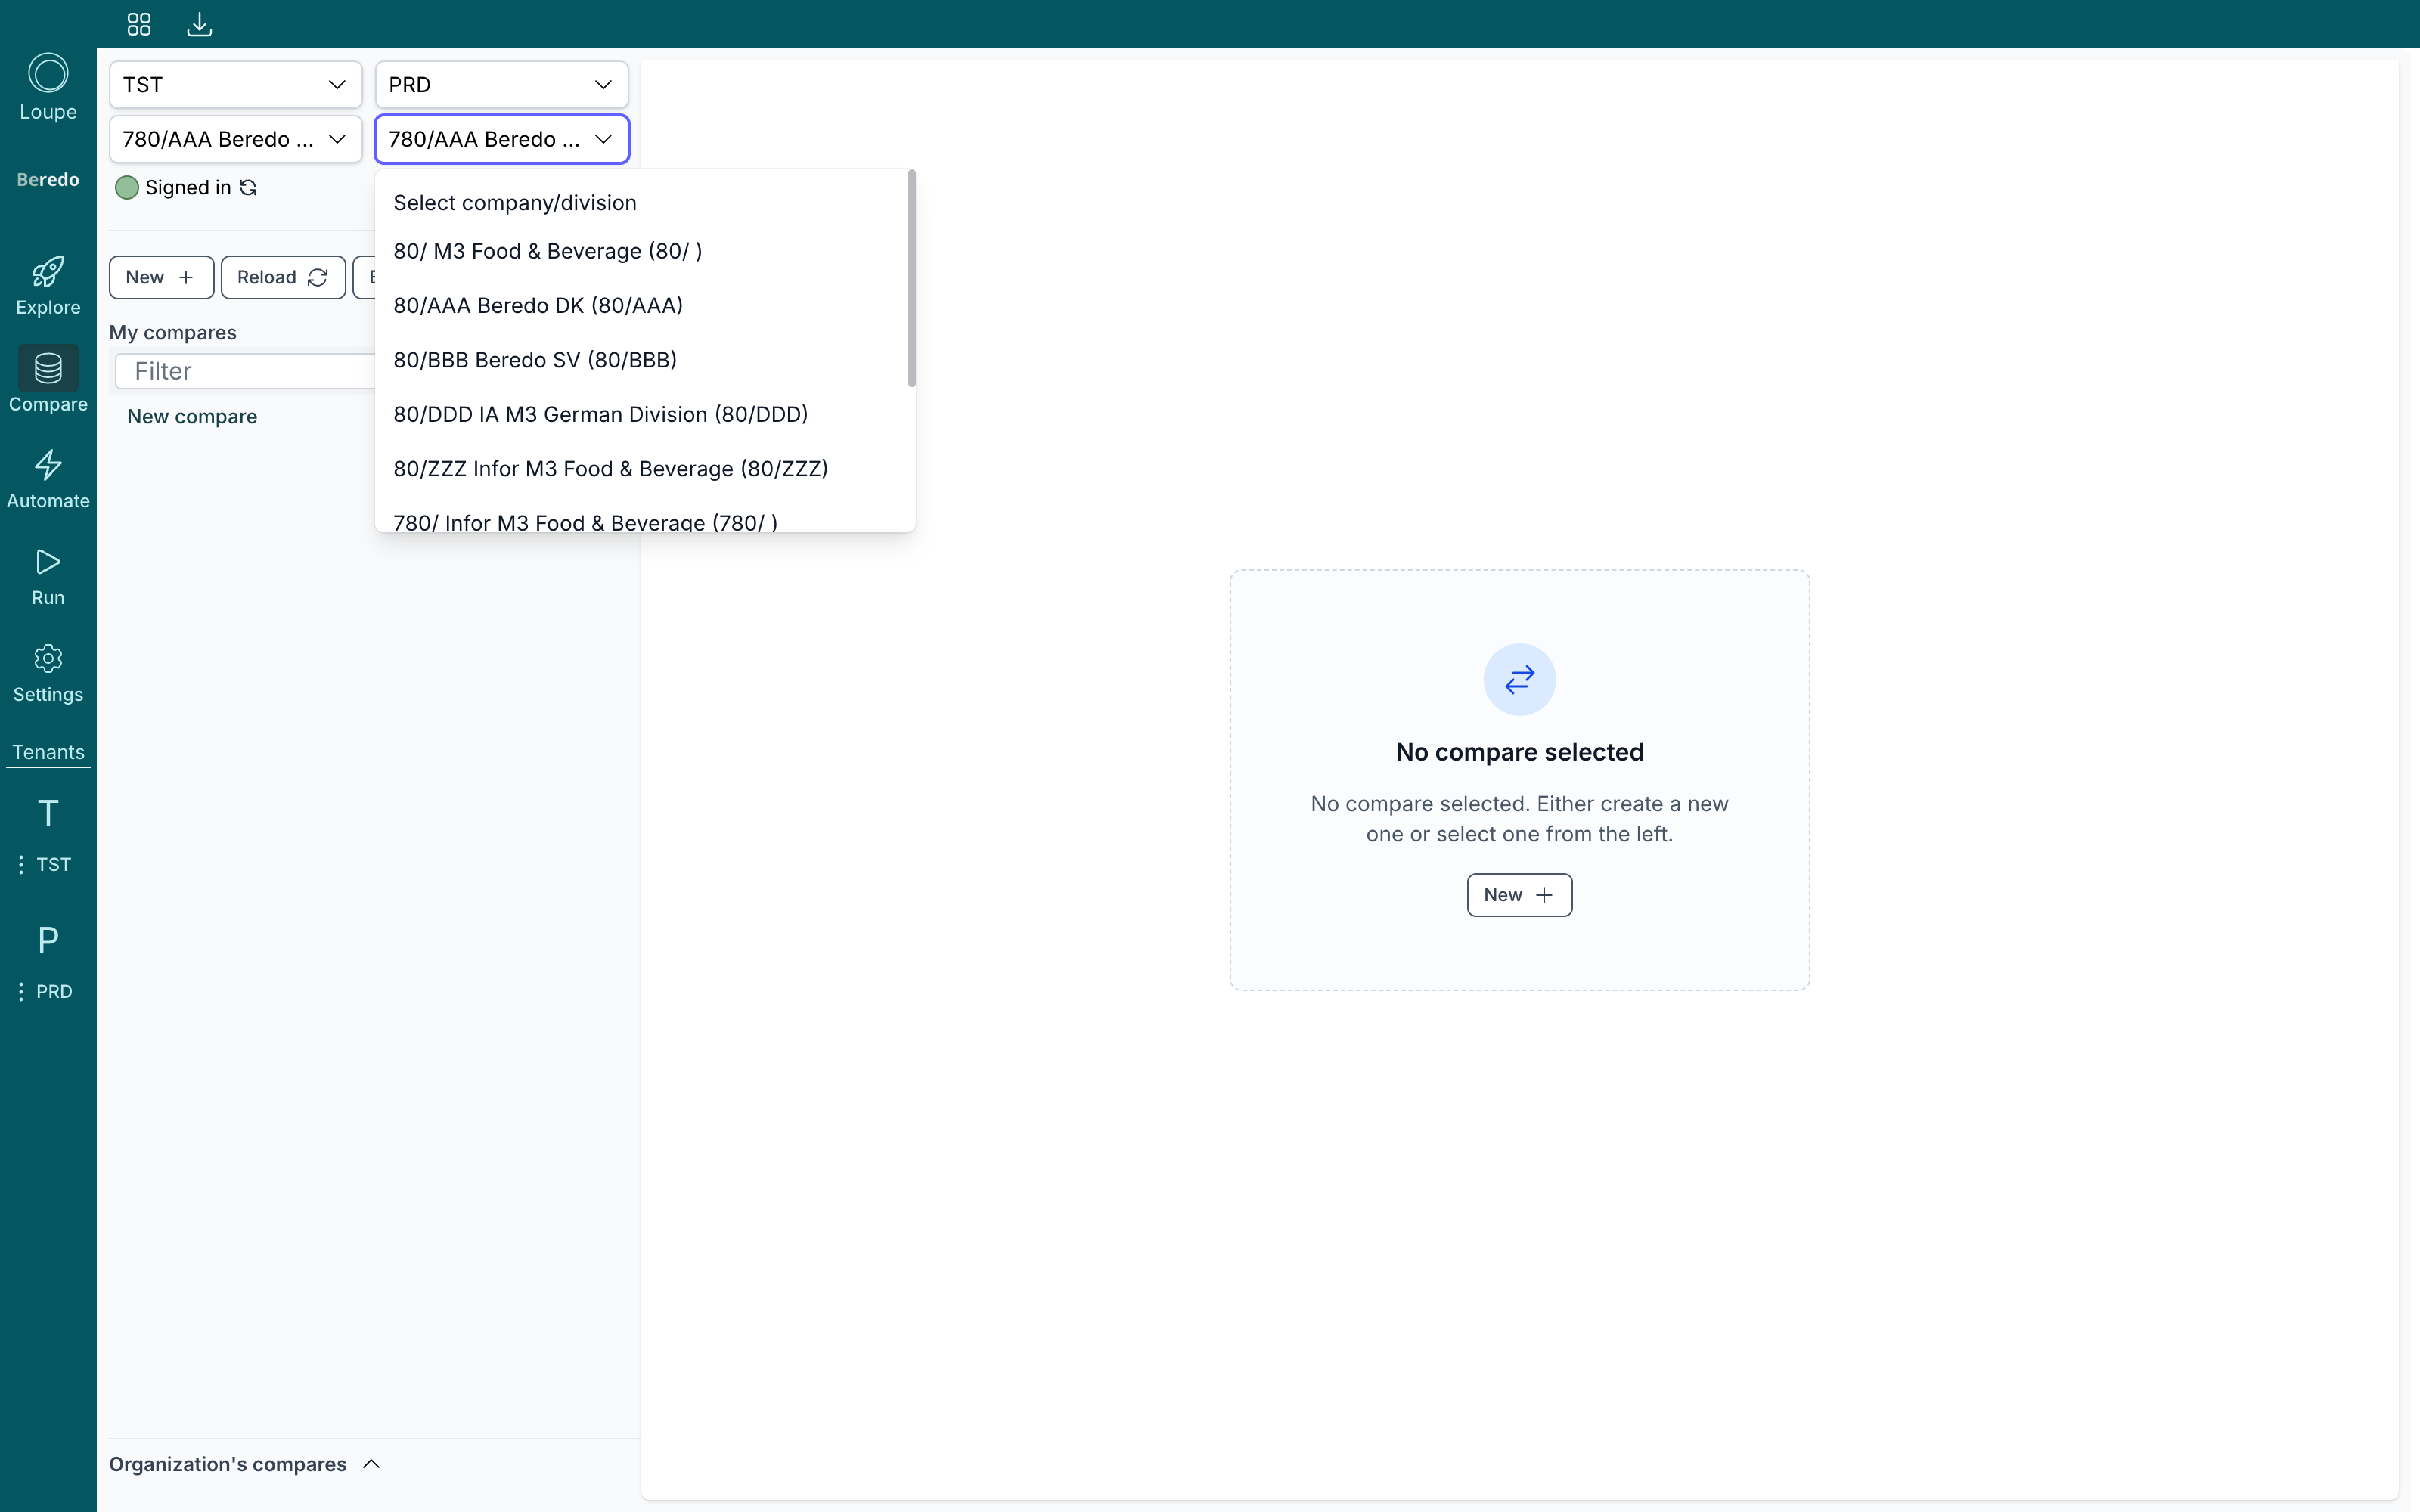
Both sides can also point at the same environment with different companies or divisions. The summary bar then labels the sides by company/division instead of by environment name.
Create a compare
Click New above the compare list. The new compare opens on the right and appears under My compares with a row of actions. Give it a name with the pencil icon.
Add a table
Search in the Table box (Alt+T, or ⌥T on a Mac) by table name, program or keywords:
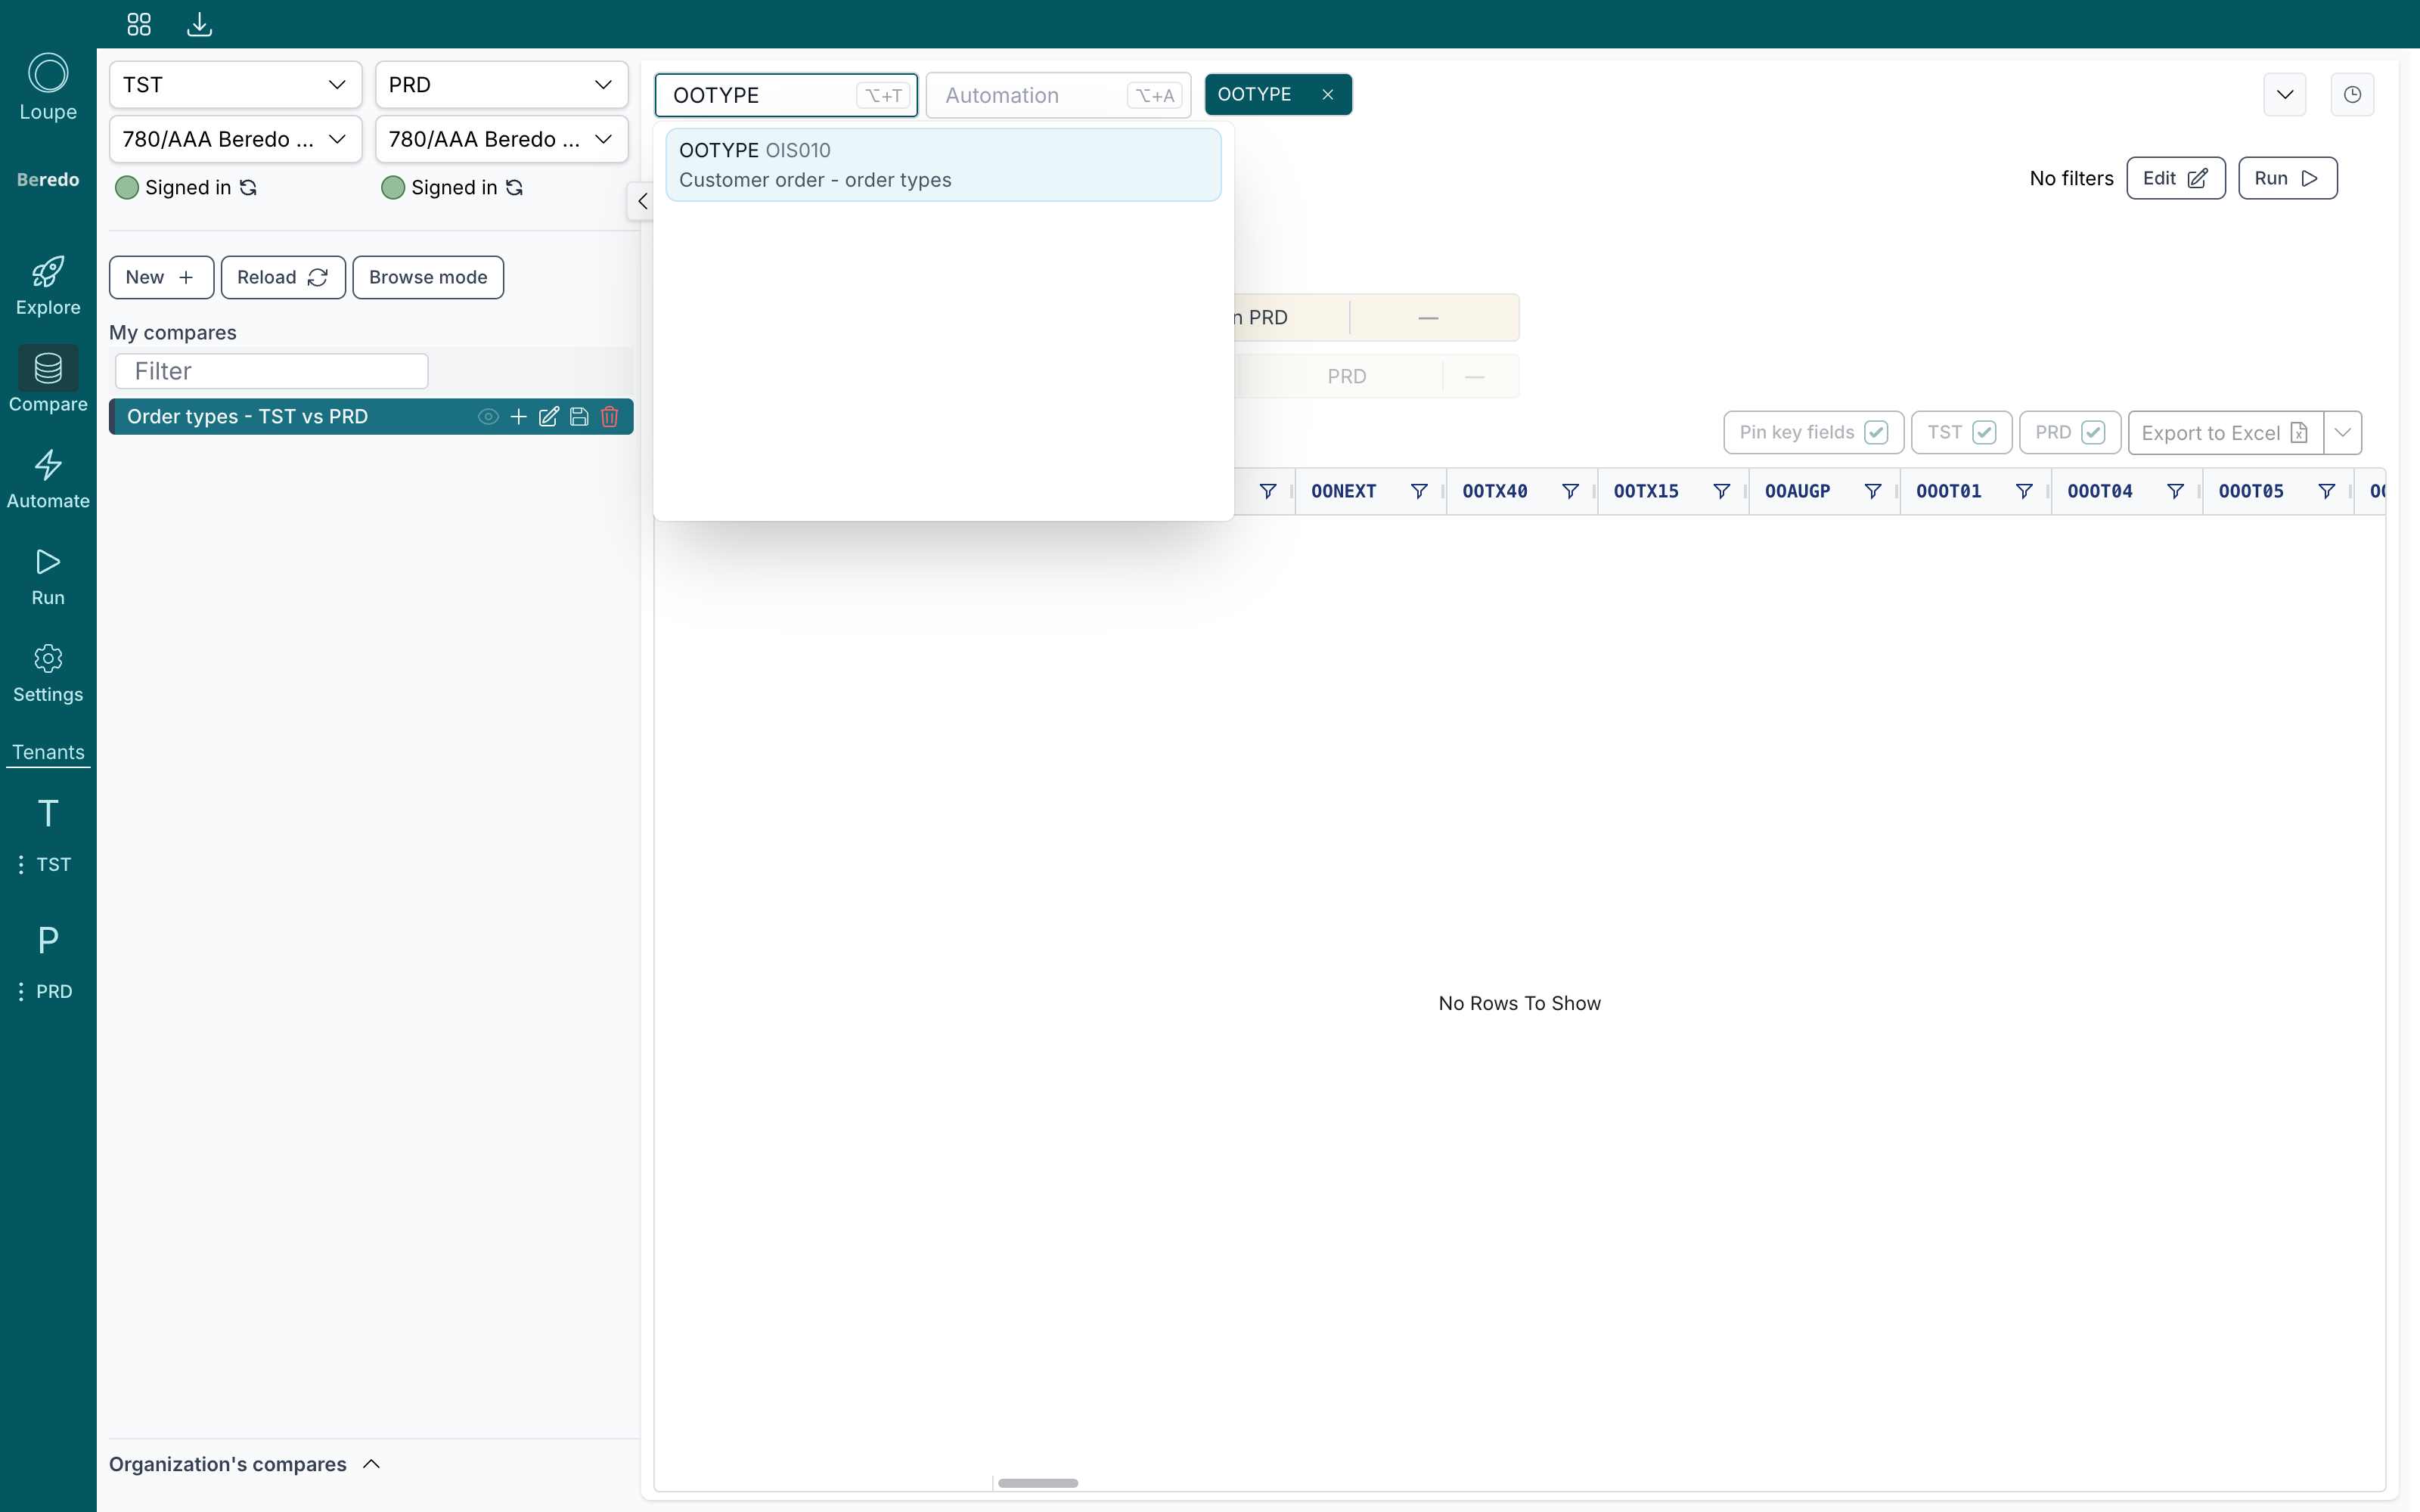
Pick the table and press Run. The results load side by side:
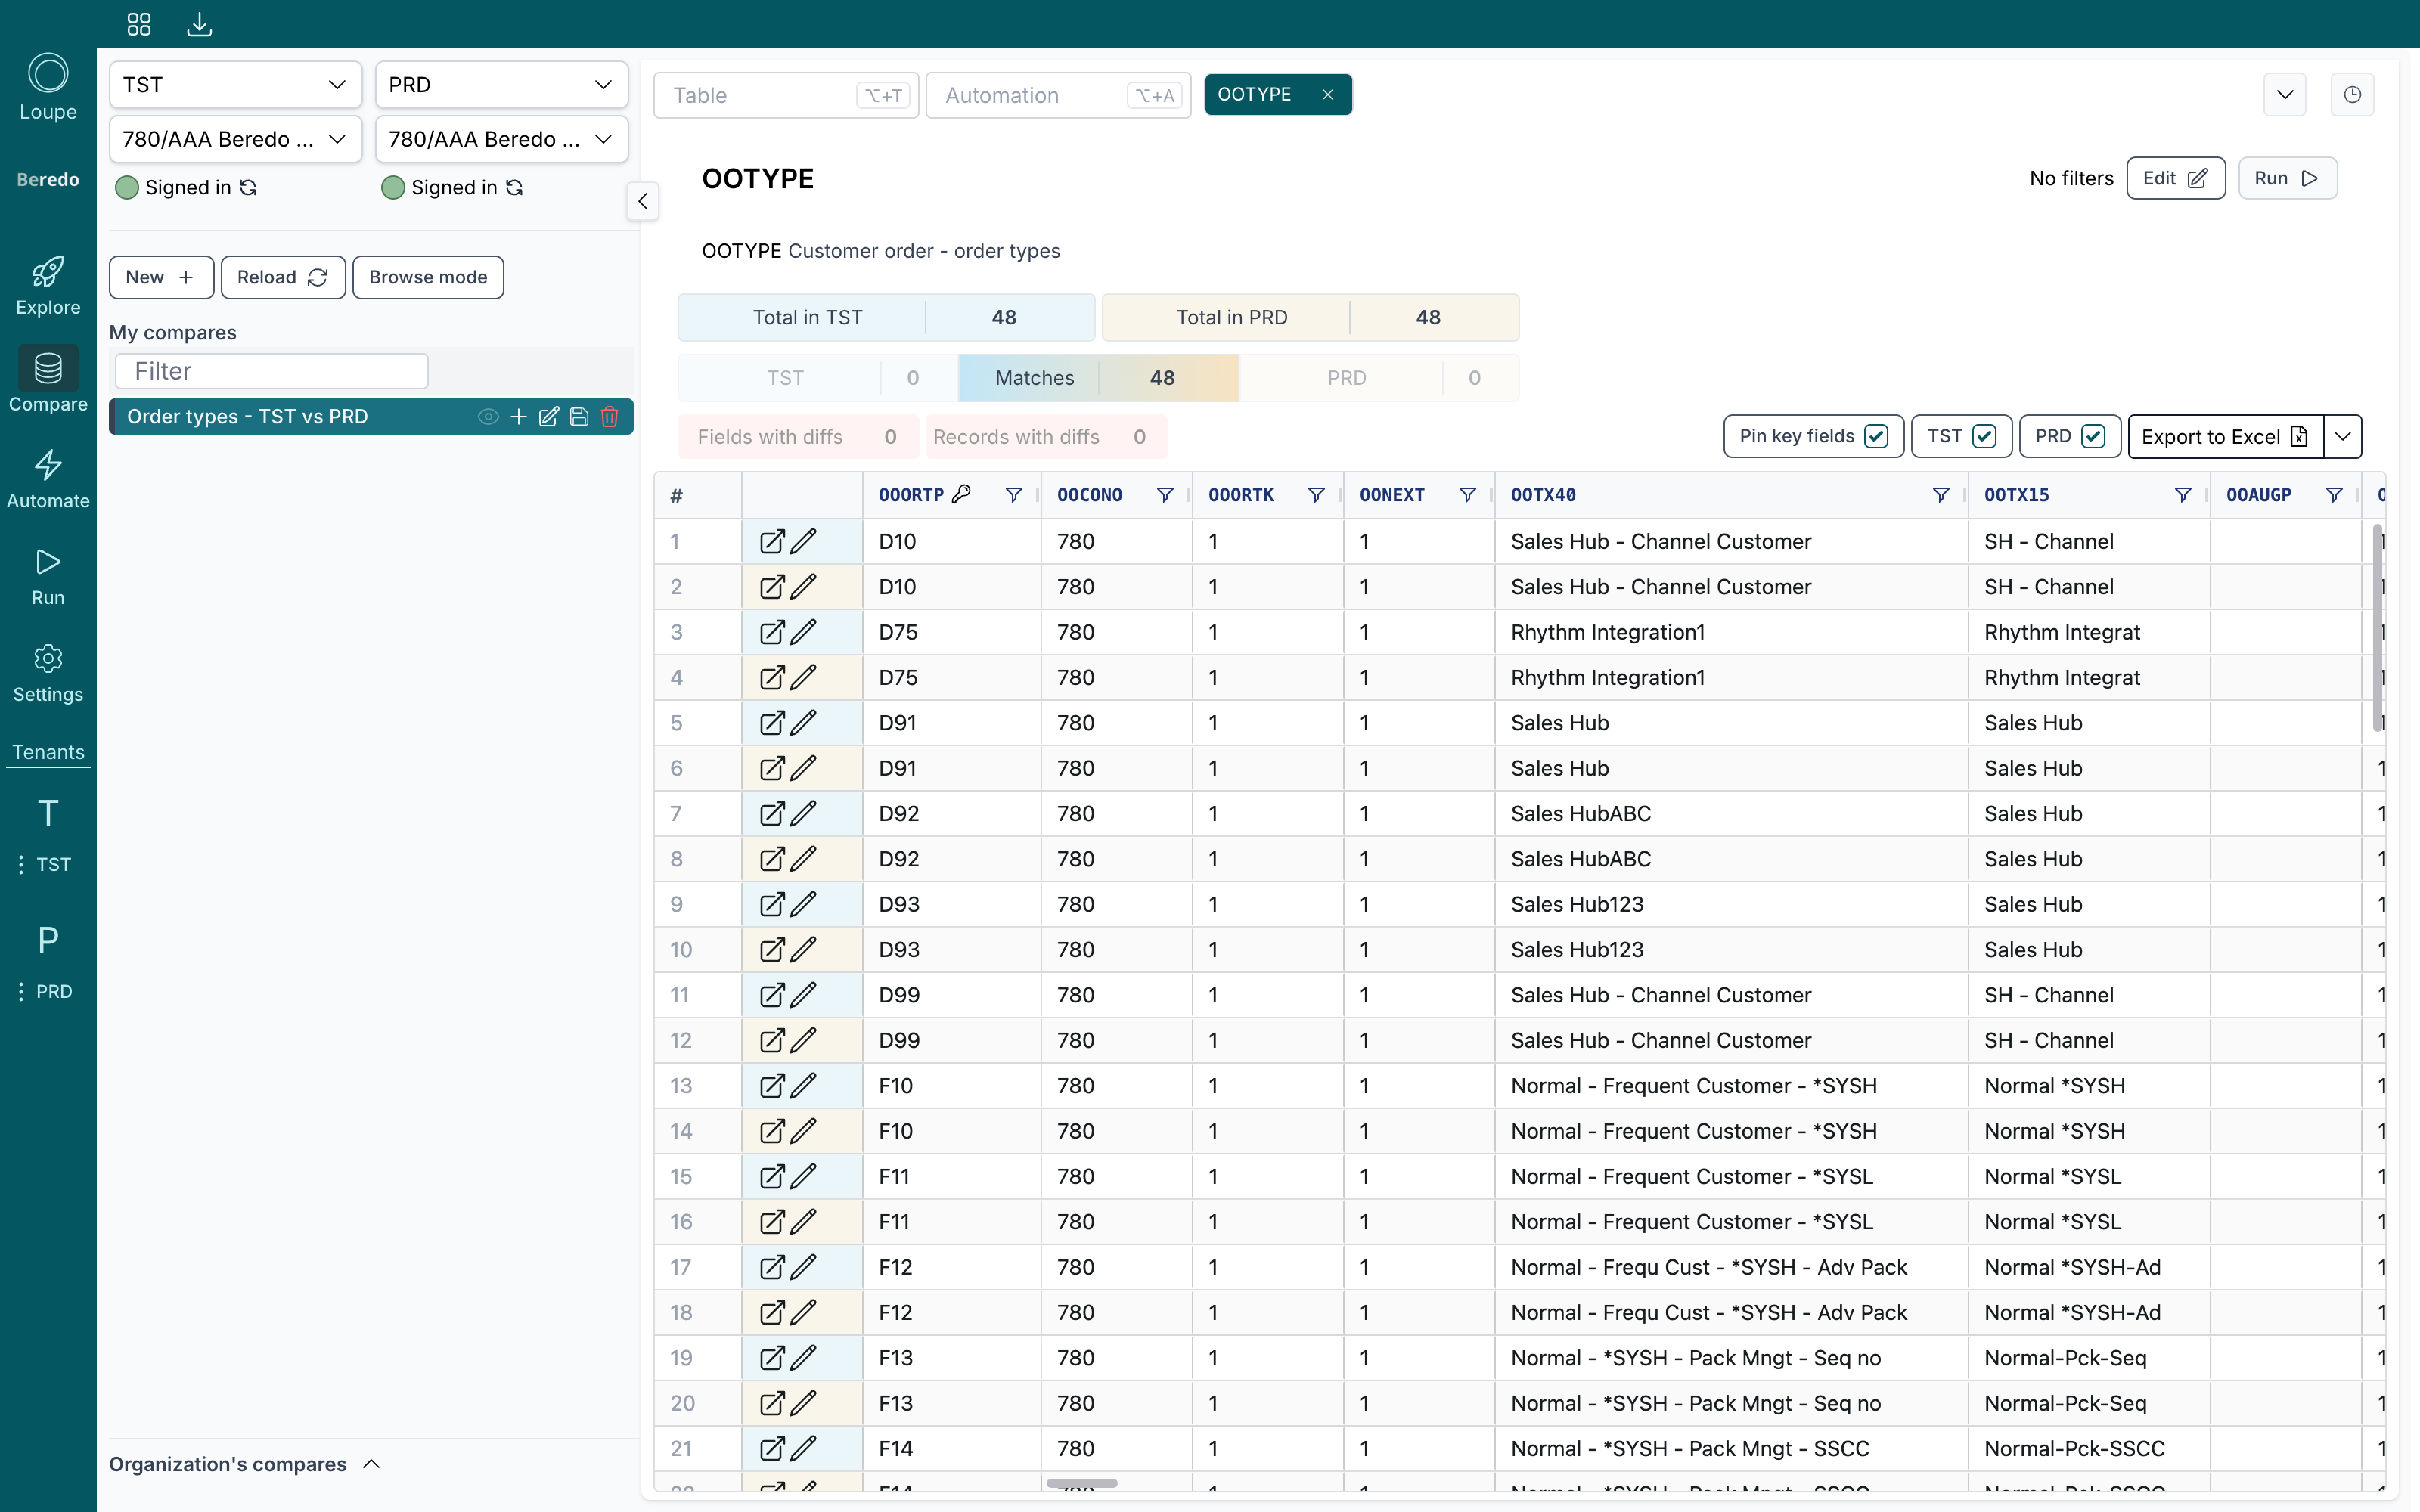
The bar above the results summarizes the comparison at a glance. Every segment is a button that filters the grid to that set of rows:
- Total in TST / Total in PRD shows the row count on each side.
- TST / Matches / PRD splits the rows into only-in-left, found in both, and only-in-right.
- Fields with diffs collapses the grid to the columns where the two sides disagree.
- Records with diffs shows only the rows that differ. Differing cells are highlighted in the grid.
On the right, Pin key fields keeps the key columns visible while you scroll, the two environment checkboxes hide one side's values, and Export to Excel (or Export to CSV from the arrow menu) saves the grid.
A compare can hold many tables. Each one gets its own tab at the top, and you can drag the tabs to reorder them.
Large tables
Compare loads at most 10 000 rows per side. If a table has more, a banner tells you that only the first 10 000 records are shown. Use filters to narrow the result.
Filter a table
Click Edit above a table to configure it:
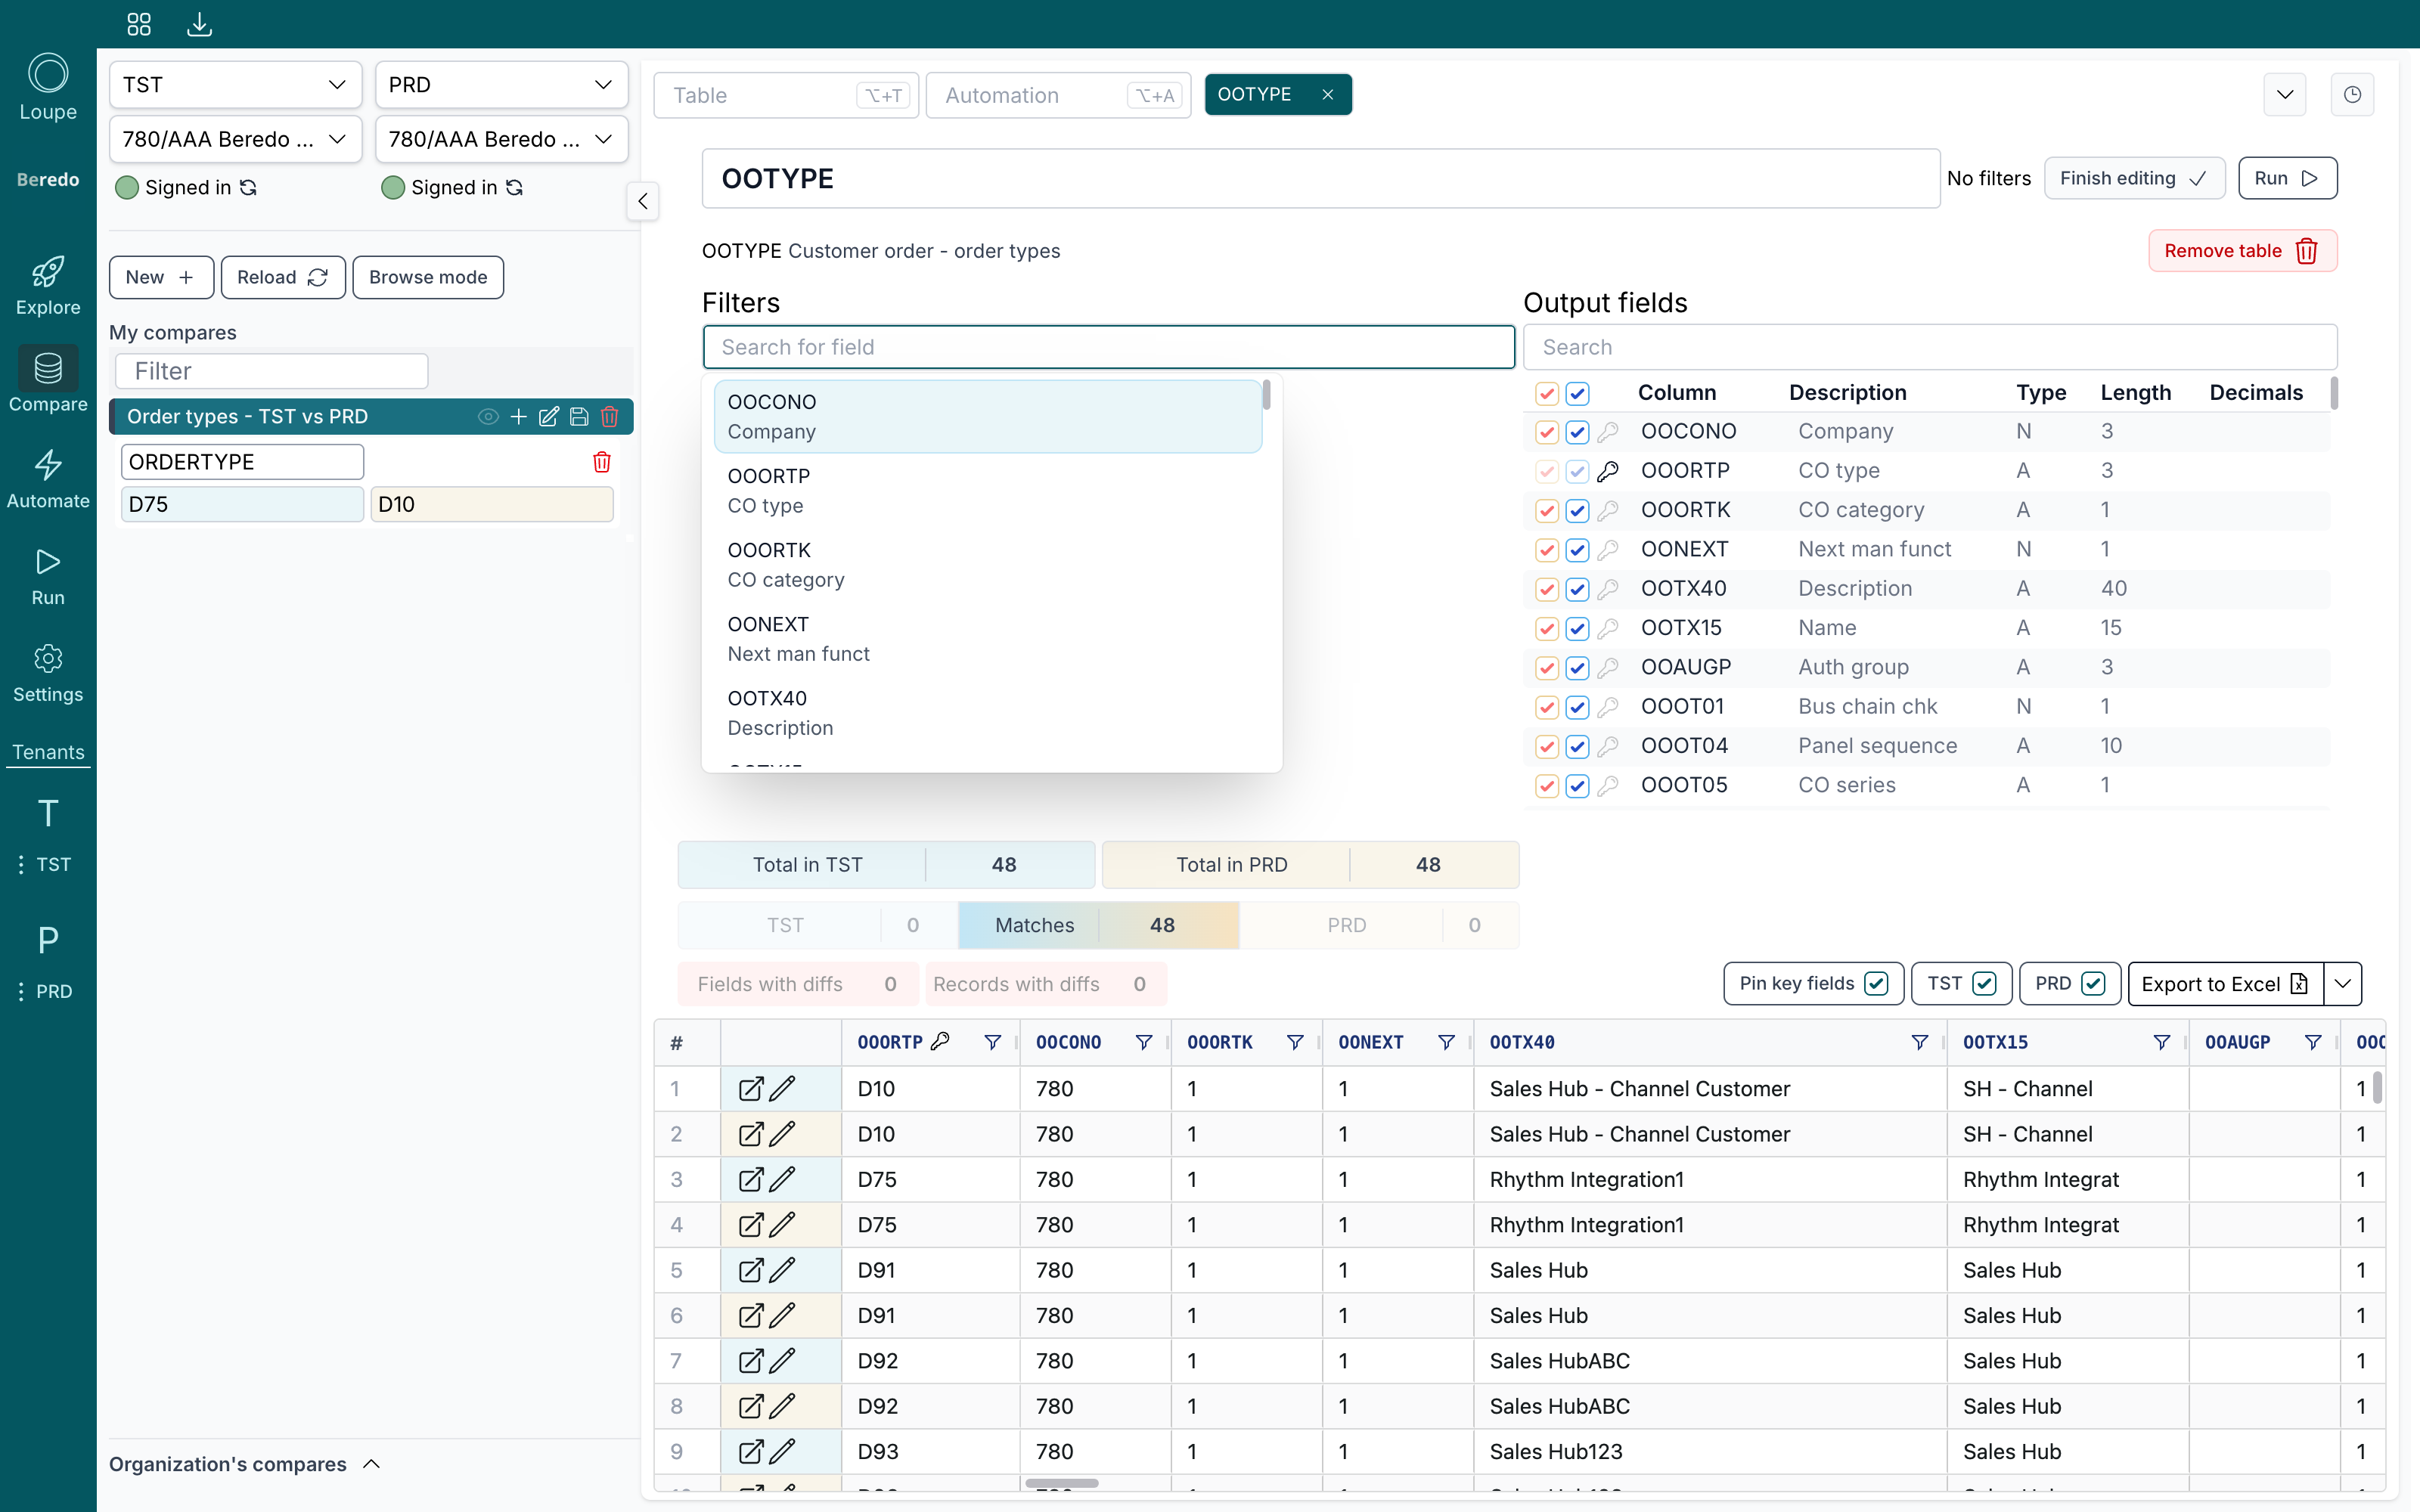
- Filters: search for a field, pick it, choose an operator (
=,!=,>,<,>=,<=) and set a value. Combine several filters with and or or. The list icon next to the value lets you pick a variable instead of a fixed value. - Output fields: each column has two checkboxes and a key icon. The pink checkbox, Include in comparison, decides whether differences in that column count as a diff. The blue checkbox, Include in output, decides whether the column is shown at all. The key icon, Set as key field, makes the column part of the key used to match rows between the two sides.
Click Finish editing and run again. If a filter is invalid, the Edit button gets a red border and Run stays disabled until you fix it.
Save, rename, share and delete
Every compare in the list has a row of actions:

From left to right:
- Eye: sharing options
- Plus: add a variable
- Pencil: rename the compare
- Diskette: save it. Loupe also saves automatically a moment after every change, and
Ctrl+S(⌘S) saves immediately. - Trashcan: delete it
An amber * after the name means there are unsaved changes. The clock icon at the right end of the tab row opens the History panel, where every save is listed and any earlier version can be restored.
Tooltips everywhere
Every icon in Loupe shows a tooltip on hover, so you're never left guessing what a button does.
Browse mode
When you want to dig through one environment without comparing, click Browse mode (or press Ctrl+B). The secondary environment is disabled, and runs only query the primary side:
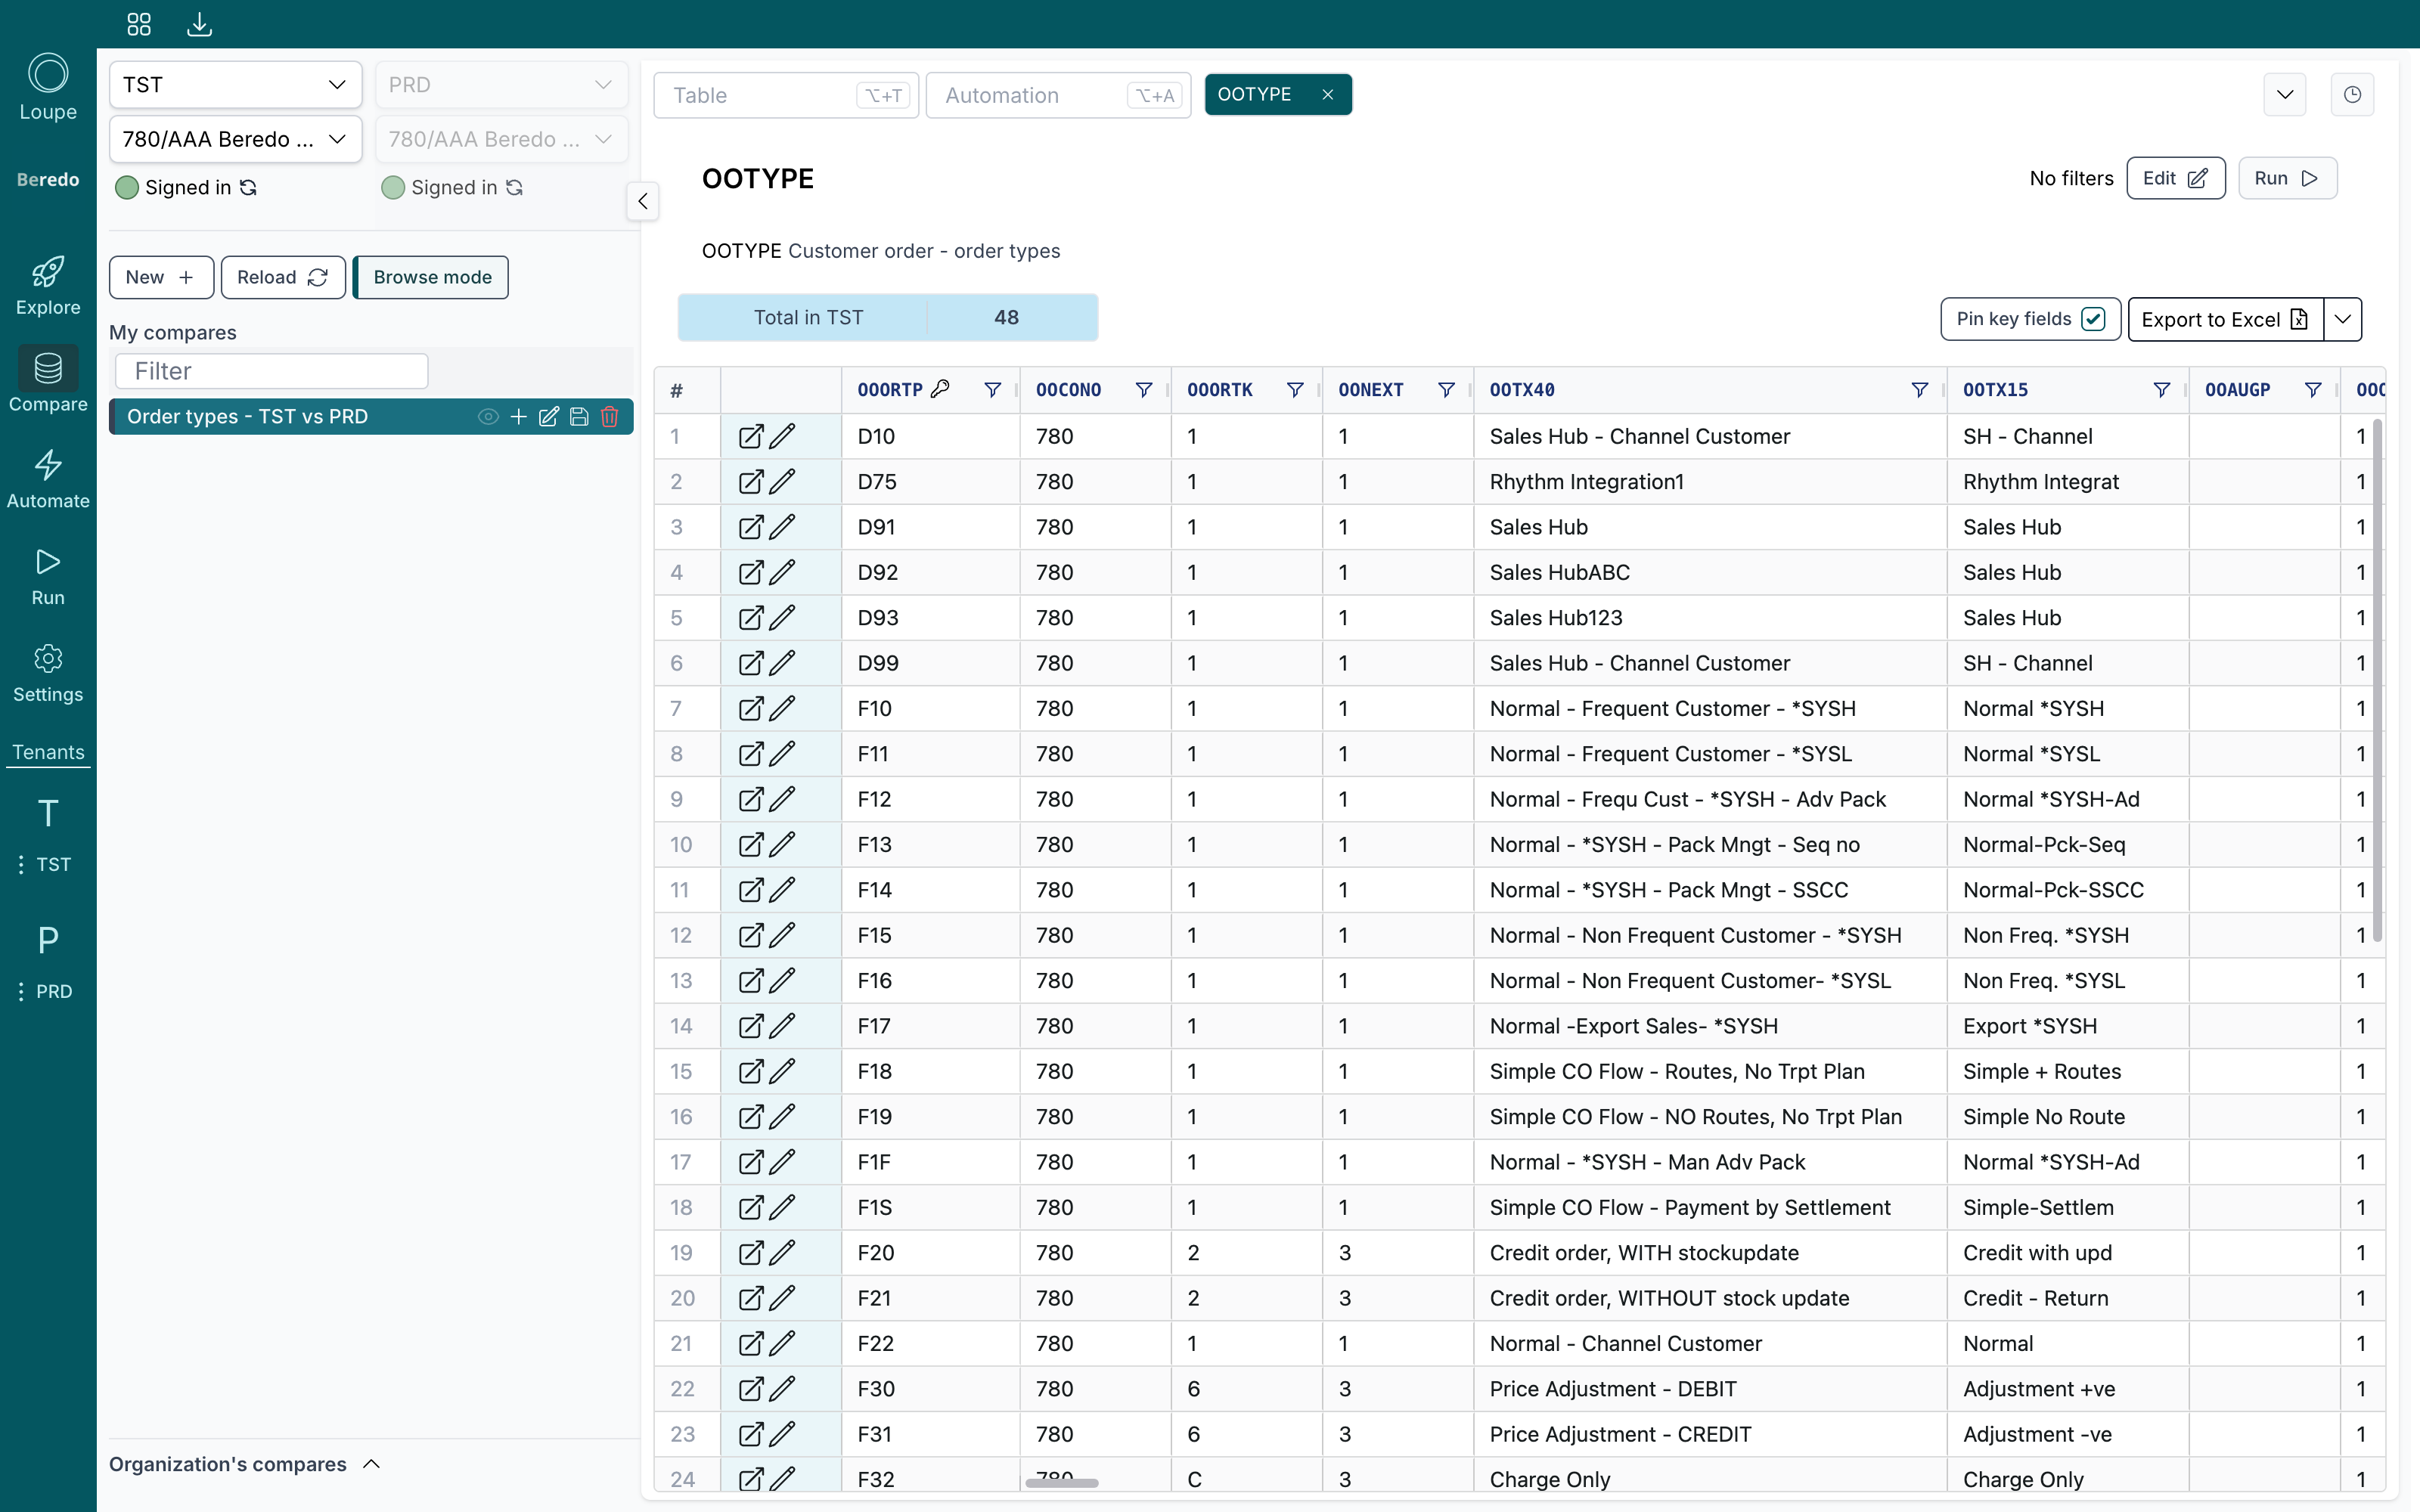
Click Browse mode again to return to comparing. For quick one-off lookups, Explore does the same thing without saving anything.
Open rows in M3
The two icons in the far-left column of the results open that row directly in its M3 program: the arrow opens it in browse mode, the pencil in edit mode. The program opens inside the environment's own M3 view, so you stay in Loupe.
Loupe uses M3's own metadata to find the right program. For CSYTAB, a number of links have been added manually. If a link is disabled, hover it to see which fields it needs in the output.
Missing a CSYTAB link that should exist? Let us know at support@loupeapp.net.
Use an automation as a compare source
Tables aren't the only thing you can compare. An automation that only reads data and has Use in compare enabled can be added to a compare from the Automation box (Alt+A) next to the table search. Loupe runs the automation on both sides and compares the exported rows using the key fields from its data export step. This is how you compare things that a single table can't express, such as the result of a Lst transaction enriched with a Get.
Next steps
- Use variables to change a filter value across many tables at once, or to compare rows with different key values.
- Share your compares with colleagues.