Getting started
Set up your organization
Before your team can use Loupe, your organization needs at least one Infor M3 environment connected. This is a one-time setup per environment, done by a Loupe administrator with access to Infor OS.
How it works
Loupe talks to M3 through the ION API, as the signed-in user. Every call runs under that user's own M3 permissions, so people only ever see the data they are authorized to see in M3.
For that to work, each M3 environment needs an Authorized App registered in Infor OS. You download its credentials as an .ionapi file and upload that file in Loupe.
Two meanings of tenant
Infor calls each M3 environment a tenant, and Loupe uses the same word: the Tenants section in Settings and in the sidebar lists your M3 environments (for example TST and PRD). Your company's account in Loupe is called an organization.
Getting a Loupe organization
Organizations are created by the Loupe team. If your company doesn't have one yet, get in touch and tell us who should be the first administrator. Once the organization exists, the administrator signs in to Loupe and continues below.
Open the API Gateway
Sign in to the M3 environment you want to add to Loupe, then open the app switcher (the grid icon in the top bar) and choose OS. From the OS overview, open API Gateway:

Naming varies between installations
Depending on your CloudSuite version, this area may be labelled ION API instead of API Gateway. The Authorized Apps screen inside is the same.
Create an Authorized App
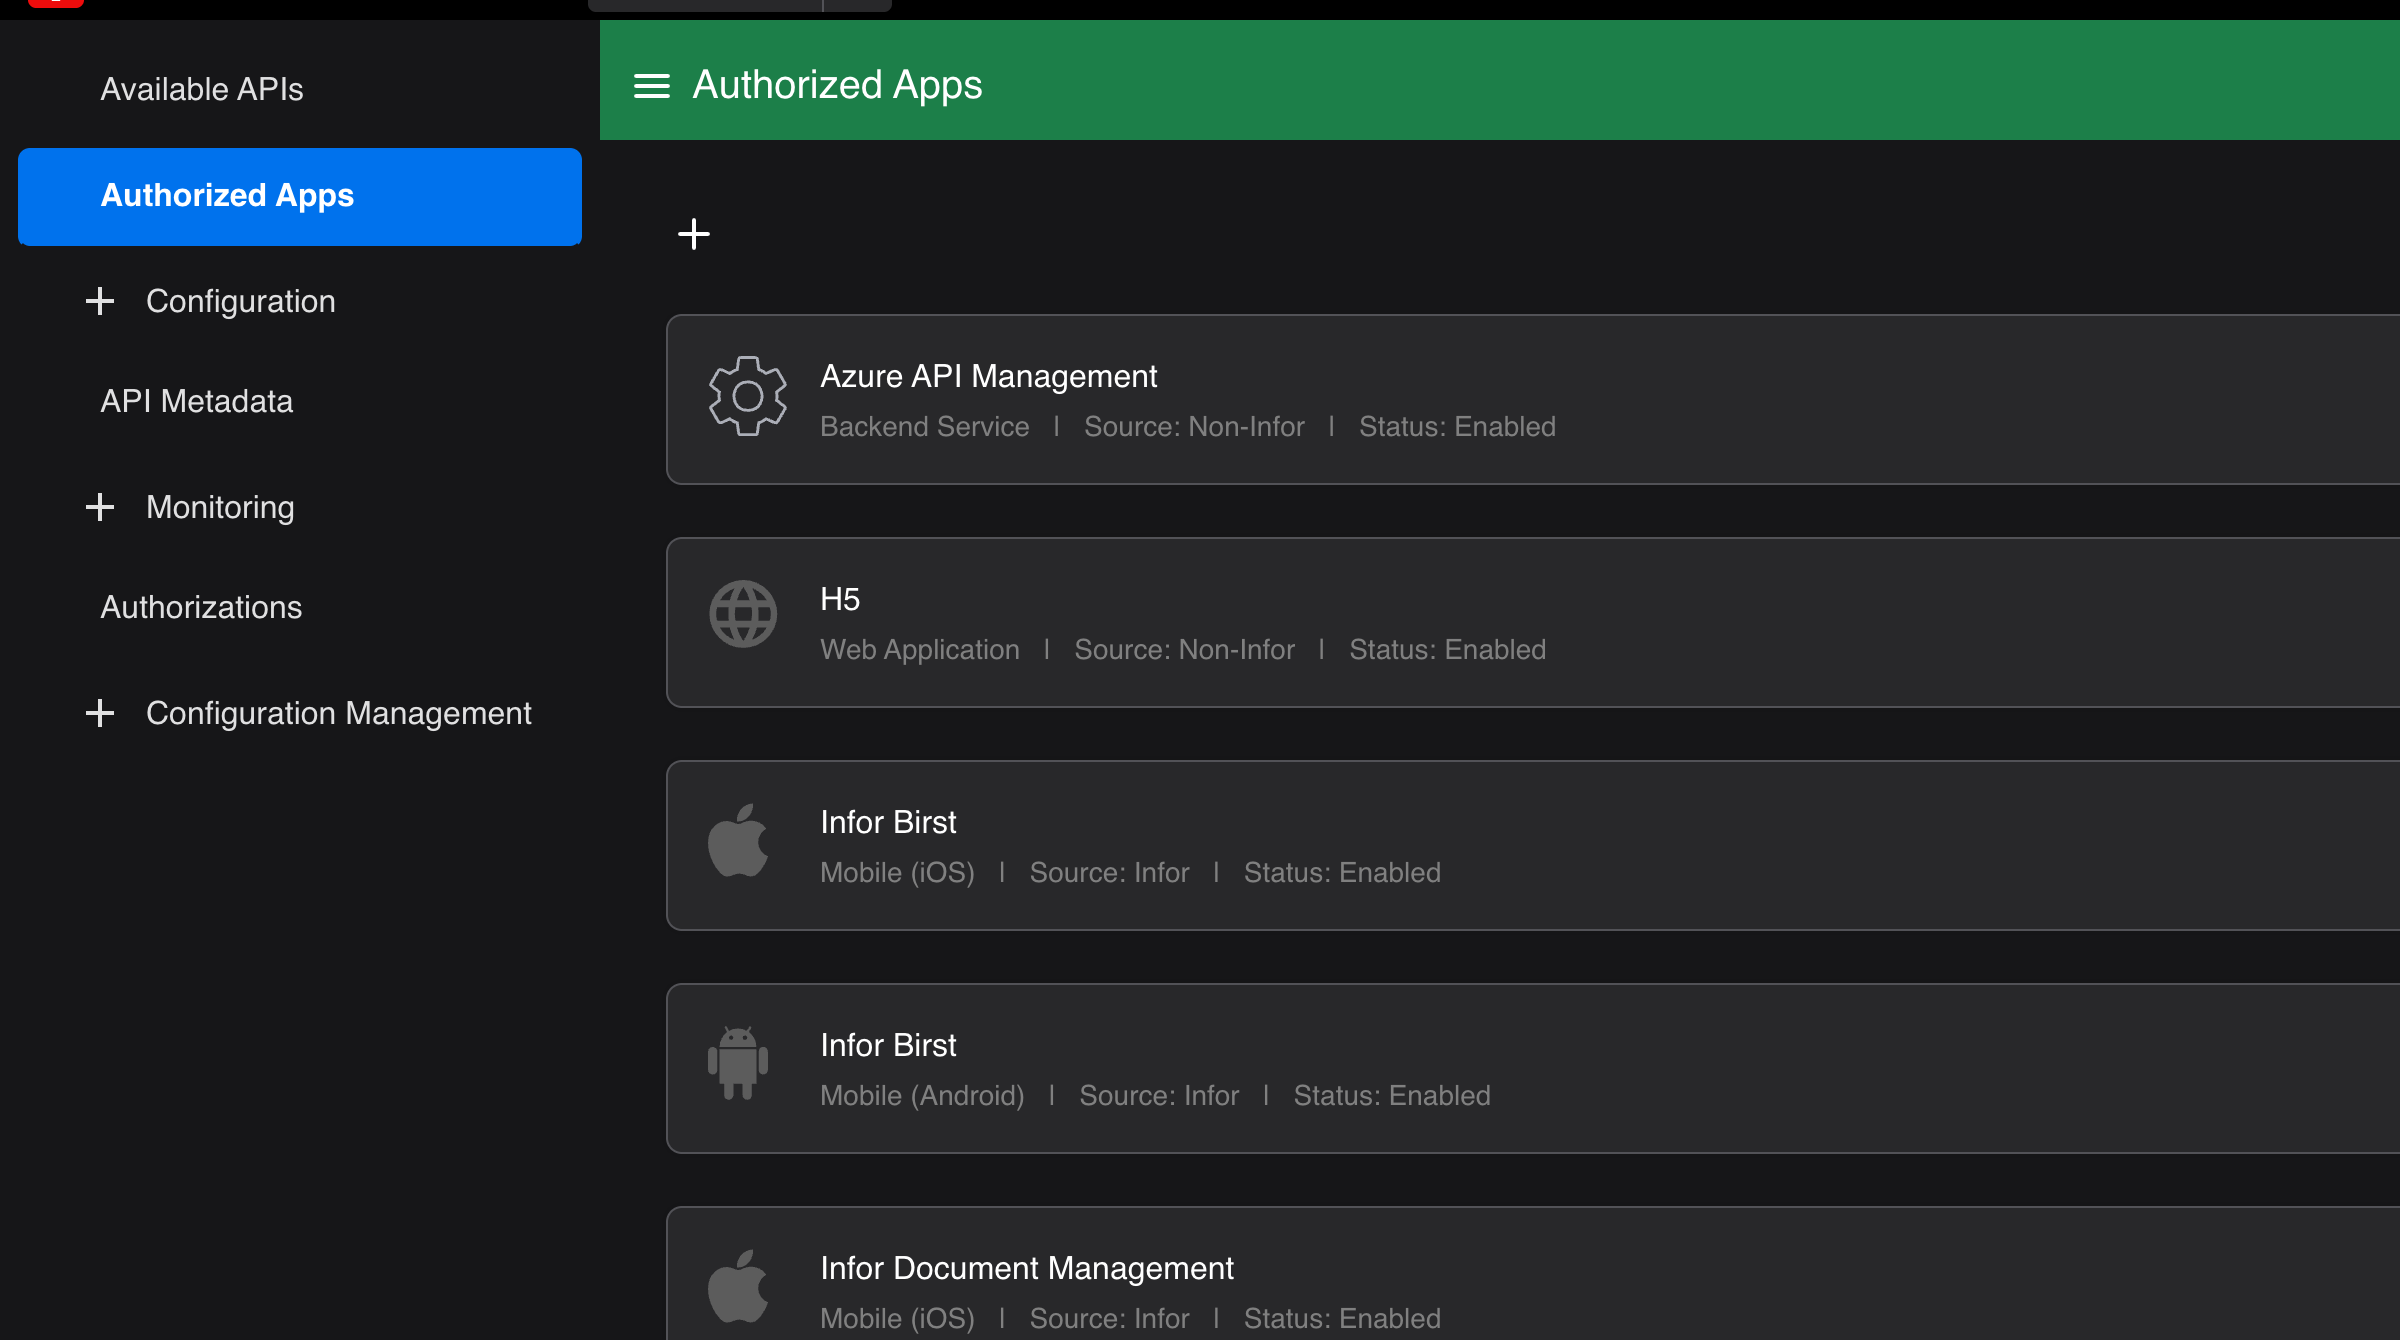
Open Authorized Apps in the left panel, then click the plus (+) to add a new app:
Choose the type Web Application and fill in the following values. Loupe shows the same values, ready to copy, under Settings → Tenants → Details for authorized app:
Field Value Type Web Application Name LoupeDescription Authorized app for LoupeRedirect URL https://loupeapp.net/login/finishAuthorized JavaScript Origins https://loupeapp.net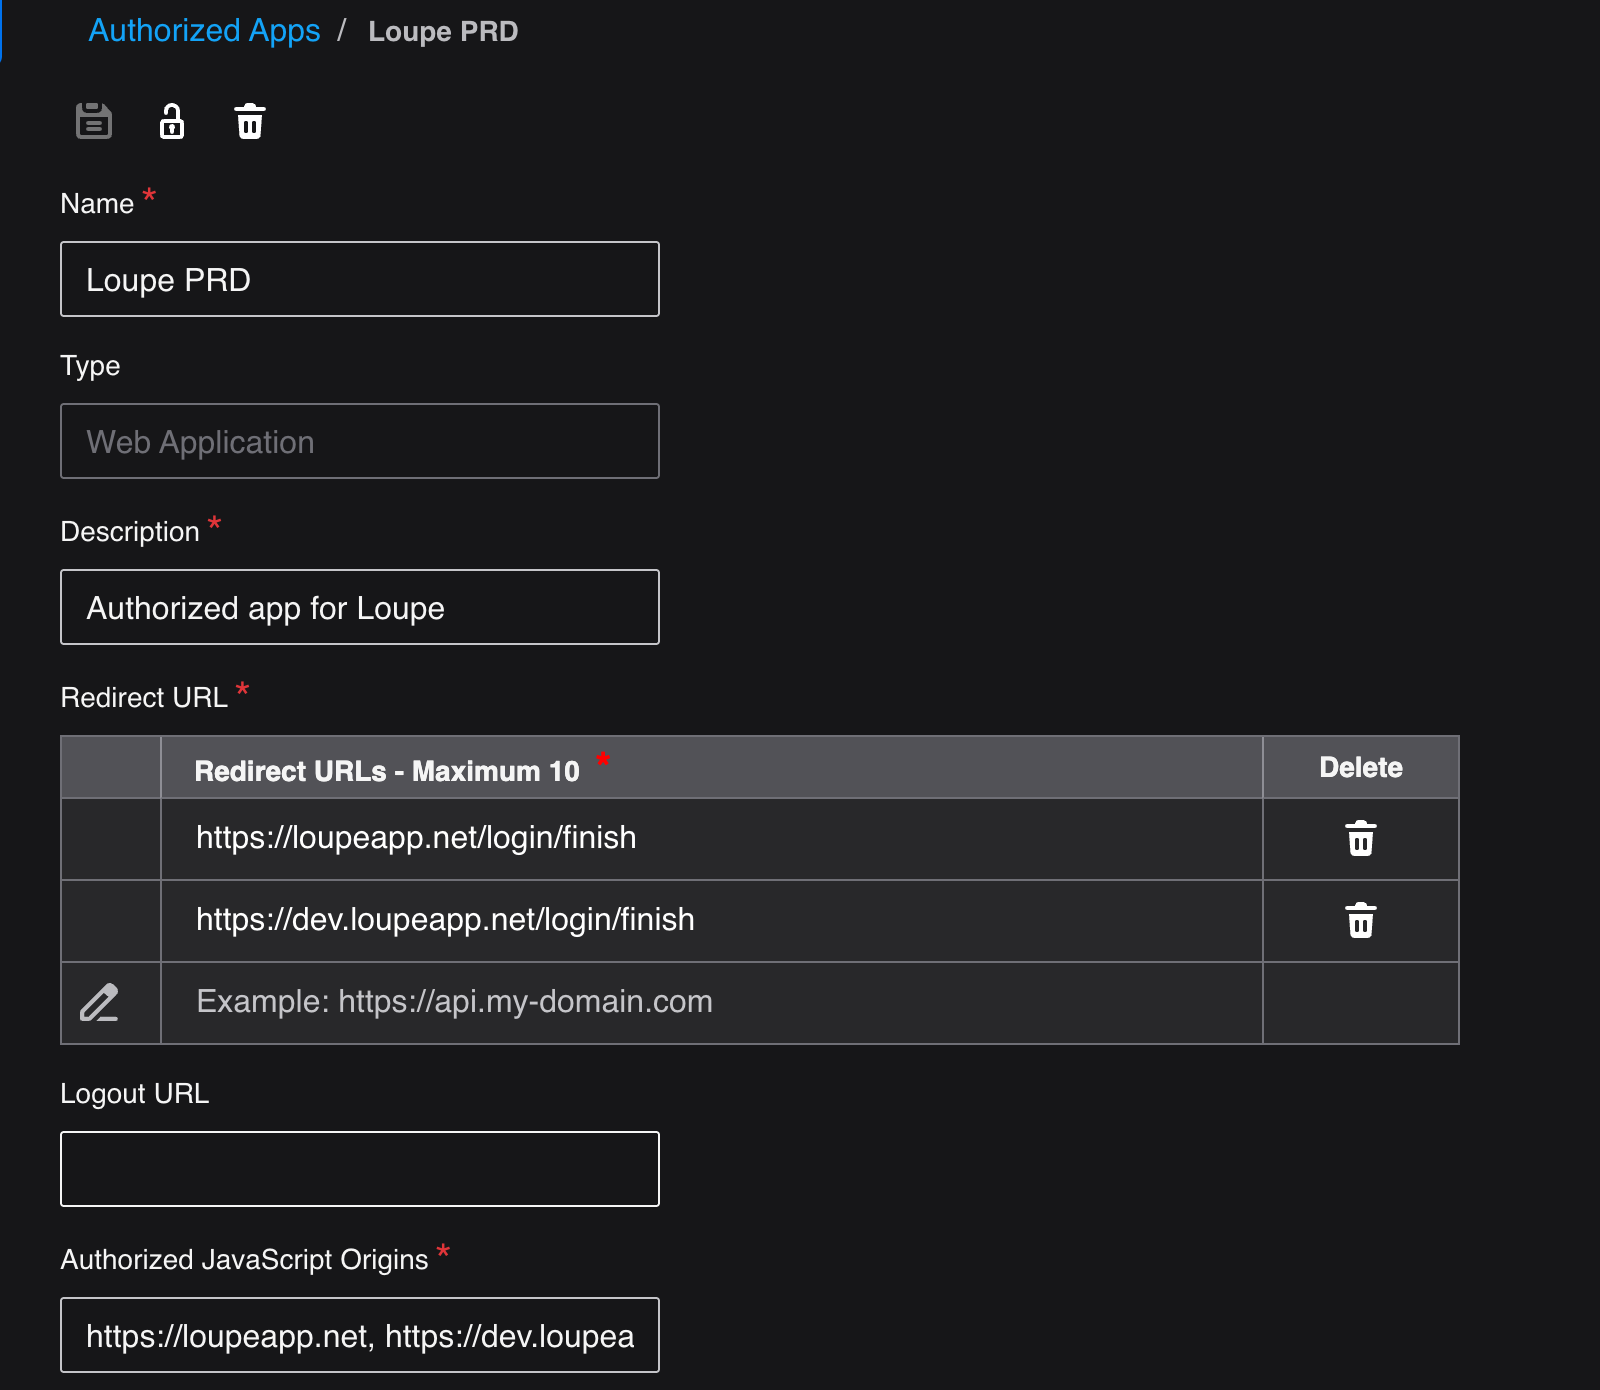
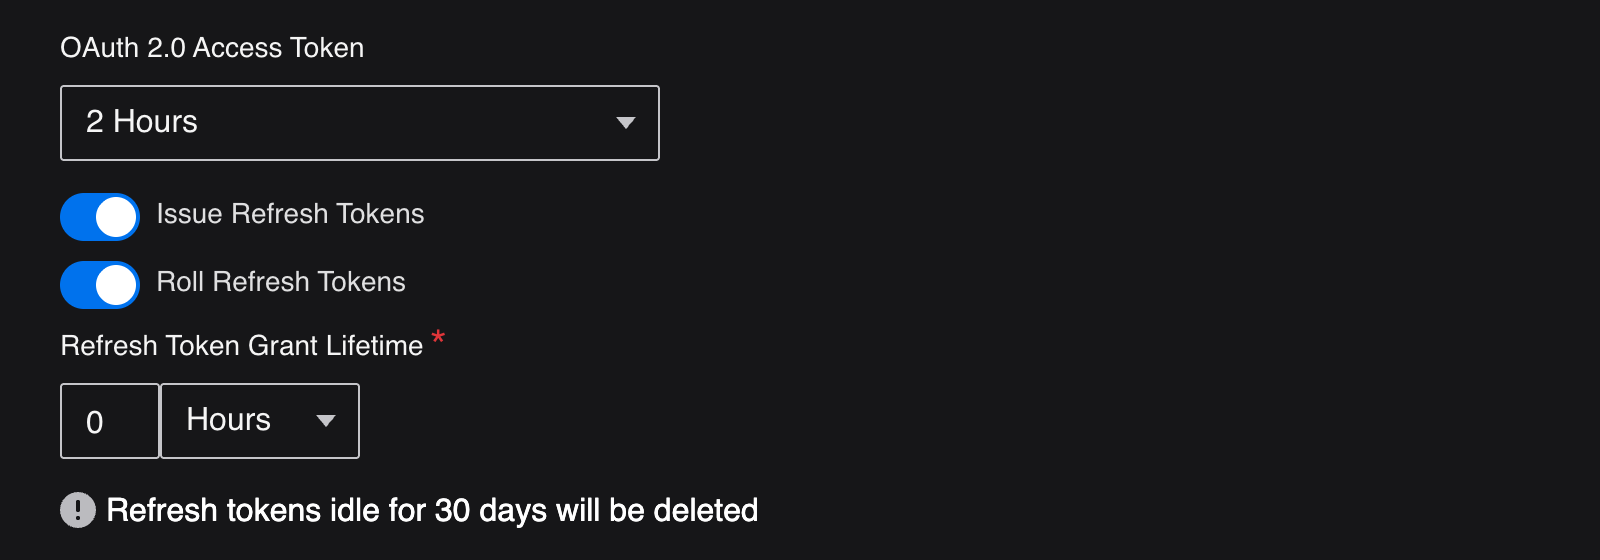
Enable Issue Refresh Tokens. Without refresh tokens your users have to sign in to the environment again every time the access token expires:
Save the app and use Download Credentials to get its
.ionapifile.
Use a Web Application, not a backend service
The redirect URL must be exactly https://loupeapp.net/login/finish. Loupe rejects .ionapi files from backend service accounts (files containing service account keys), because those would bypass each user's own M3 permissions.
Add the environment in Loupe
- In Loupe, open Settings and scroll to Tenants.
- Click Add New Environment.
- Drop the
.ionapifile on Add an Infor tenant, or click to browse for it. You can add several files at once. - Check the parsed details and give the environment a short name (for example
TSTorPRD). This is the name your users will see everywhere in Loupe. - Click Save.
Repeat for every environment you want to work with. Under Defaults you can mark one environment as Left and one as Right, which preselects them in Compare for everyone in the organization.
Invite your users
Users are added in Settings → User management:
- Type a colleague's email address under Add Members and click Add. If they have signed in to Loupe before, they are added straight away. Otherwise an invite is created and they get an email; the invite is converted automatically the first time they sign in.
- Tick the environments they may use. Each user row has one checkbox per environment. A user without any ticked environment sees nothing to sign in to.
- Pick a role: User, Viewer or Admin. See Roles.
Next steps
Once your users have installed Loupe and signed in, they can start exploring data, comparing environments or browsing the M3 UI.